Kitchen Organisation
Pantry Organisation Ideas That Actually Work (2026)
Pantry Organisation Ideas That Actually Work (2026) article.
A cluttered, disorganised pantry silently drains your household's time, money, and sanity every single week. Research from the National Kitchen & Bath Association found that the average Australian household spends 20 minutes per week searching for items in a poorly organised pantry — time that adds up to nearly 17 hours per year. The good news: a well-structured pantry system takes most homeowners just one weekend to build and requires only a few minutes per week to maintain. These pantry organisation ideas are practical, affordable, and proven to work in real Australian homes.
Table of Contents
- Why Most Pantry Systems Fail Within Months
- The Foundation: Start With a Complete Pantry Clear-Out
- Zone-Based Organisation: The Single Most Effective System
- Clear Containers and Labelling: Your Visual Superpower
- Matching Containers to Your Space
- Deep Shelf Solutions: Conquer the Back Rows
- Visual Tricks and Space-Maximising Hacks
- Door and Wall Storage: Use Every Available Surface
- Maintenance Routines: Keep Your System Working Long-Term
- Common Pantry Organisation Mistakes to Avoid
- Pantry Solutions Comparison: Which Approach Suits Your Space?
- Frequently Asked Questions
- Sources & Methodology
- About the Author
Why Most Pantry Systems Fail Within Months
Before diving into solutions, it helps to understand why so many pantry organisation attempts fall apart. The most common reason is starting with too complex a system. A beautifully arranged pantry with fifty different containers and an intricate colour-coding scheme looks stunning on Instagram, but it requires so much ongoing effort that household members quickly abandon it.
The second major failure point is ignoring how the household actually uses the pantry. A system designed around how things look rather than how often they are reached for creates friction every single day. When reaching for a bag of rice requires moving three other items, the system breaks.
The third issue is no maintenance plan. Every pantry, no matter how well designed, accumulates clutter over time. Open packets get shoved in corners. Leftover ingredients from last week's recipe sit behind newer items. Without a scheduled quick tidy, even the best initial setup degrades within 6–8 weeks.
The ideas in this guide are built to avoid all three failure modes. Each system described here is simple enough for every household member to follow, organised around how you actually use the space, and comes with a straightforward maintenance routine. Let's dig in.
The Foundation: Start With a Complete Pantry Clear-Out
Every successful pantry transformation begins with a complete clear-out. You cannot build a reliable system on top of accumulated, forgotten, and expired items. Dedicate 60–90 minutes to this step — it is the most important thing you will do.
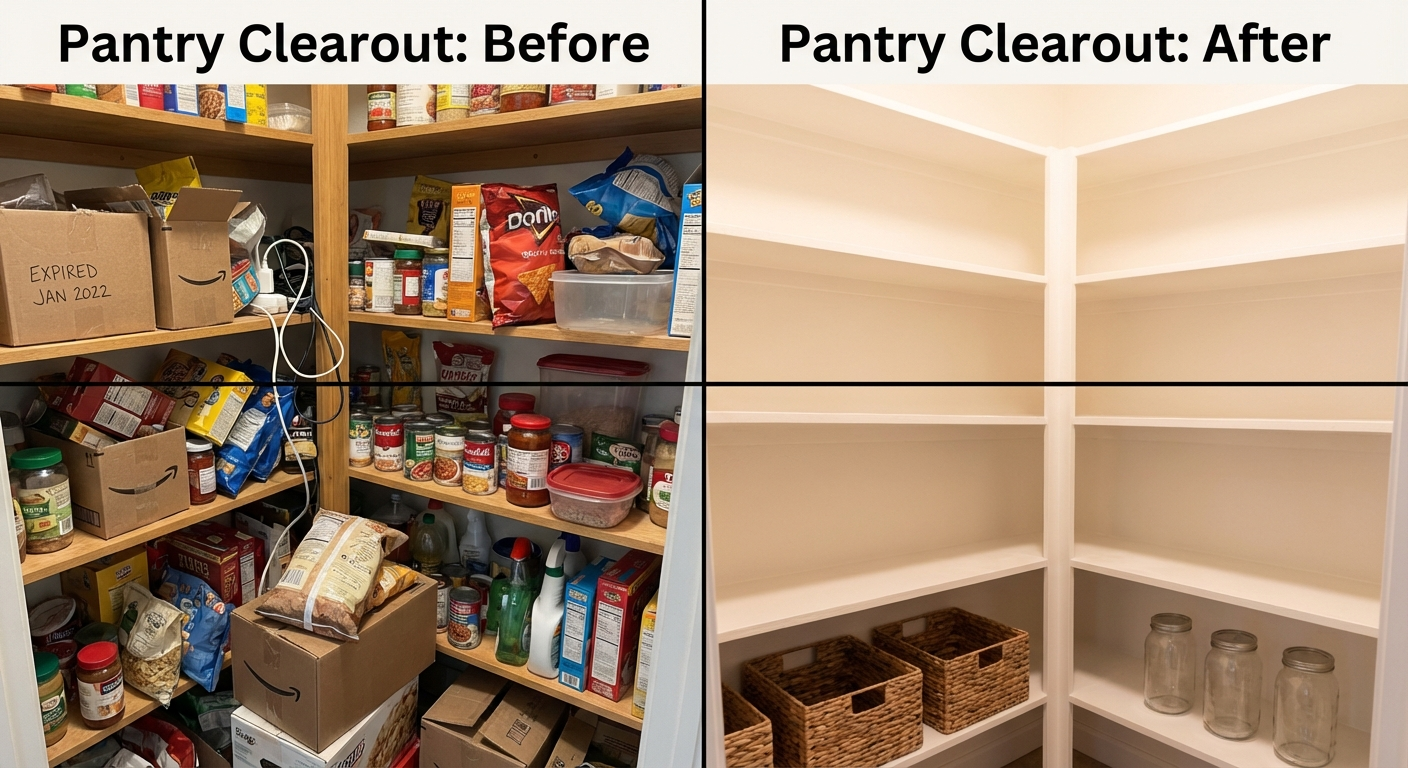
Step 1: Remove everything. Take every single item out of the pantry and place it on your kitchen bench or dining table. Yes, all of it — including the tins you have been meaning to deal with for months.
Step 2: Sort into four piles. Create a Keep pile, a Discard pile for expired or stale items, a Relocate pile for items that belong elsewhere (medicine cabinet, garage, fridge), and a Donate pile for unopened, non-expired items your household will not eat.
Step 3: Check every item. Look at use-by dates on everything. According to Food Standards Australia New Zealand, expired pantry items lose nutritional value and can pose food safety risks, particularly in humid Australian conditions. Tins with rusted or bulging lids should be discarded regardless of use-by date.
Step 4: Wipe every shelf. Use a damp cloth with a mild detergent to clean all surfaces while the pantry is empty. This removes accumulated dust, crumbs, and any spills that have seeped behind items.
Step 5: Measure your space. Before putting anything back, measure shelf dimensions — width, depth, and height. Write these down. Knowing exact measurements prevents purchasing containers or Organisers that do not fit, which is one of the most common and frustrating mistakes.
By the end of this process, you will have a clear picture of what you genuinely use, what needs storing, and what your actual storage constraints are. This is the foundation every lasting pantry system is built on.
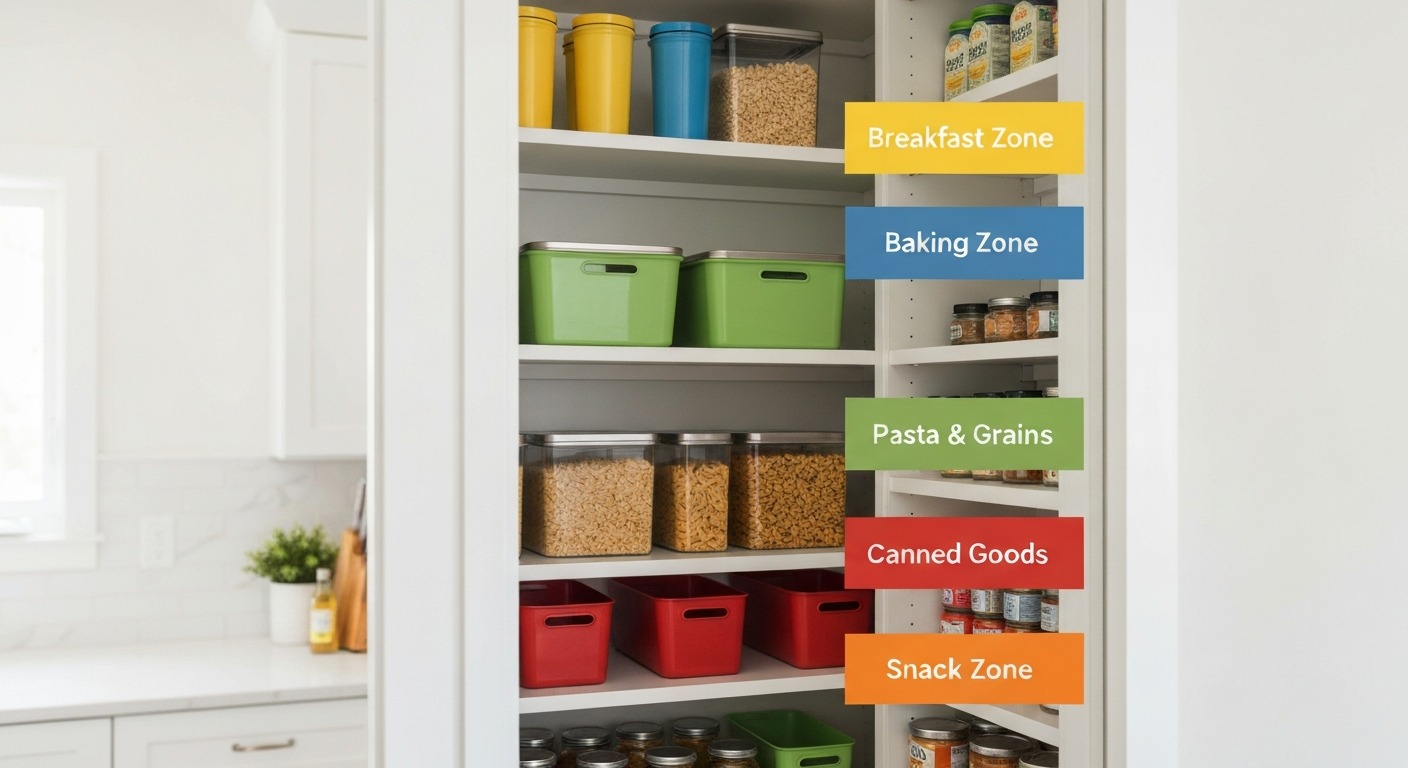
Zone-Based Organisation: The Single Most Effective System
Zone-based organisation groups items by how they are used rather than how they look. This is the single most impactful change most homeowners can make, and it costs nothing to implement.
How to Define Your Zones
A zone is simply a dedicated area for a category of items. The exact zones you create depend on your household's eating habits, but a practical starting point for most Australian homes includes:
- Breakfast zone — cereal, oats, breakfast spreads, muesli bars
- Baking zone — flour, sugar, cocoa, baking powder, mixing bowls
- Snacks zone — chips, crackers, nuts, dried fruit, individually portioned treats
- Canned and preserved goods zone — tinned tomatoes, beans, tuna, coconut milk
- Pasta and rice zone — dried noodles, rice varieties, couscous
- Oils and condiments zone — olive oil, vegetable oil, soy sauce, vinegar, sauces
- Household and other zone — batteries, light bulbs, alfoil, plastic wrap
Assign each zone to a specific shelf or section of shelf. Write the zone name on a small label and attach it to the front of that shelf or section. Every item in that category goes in that zone, and nowhere else.
The Eyes-Level Rule
One of the most powerful zone-based principles is placing the items you reach for most at eye level. Reserve your most accessible shelf positions — typically the middle two shelves in a standard pantry — for daily-use items. Lower shelves handle heavier or lesser-used items such as large bags of flour or bulk tins. The top shelves store backup supplies and seasonal items you only need a few times per year.
A household of four using the eyes-level rule typically sees morning routine times drop by 30–40% because finding the cereal, the bread, and the lunchbox containers no longer requires rummaging. For more kitchen organisation strategies, see our guide to kitchen bench organisation ideas.
Matching Zones to Household Members
If children regularly access the pantry, create a dedicated kids' zone on a lower shelf at their eye level. Stock it with pre-approved snack options in accessible containers. This reduces constant requests to "get something from the pantry" and teaches children to self-manage their food choices from a young age.
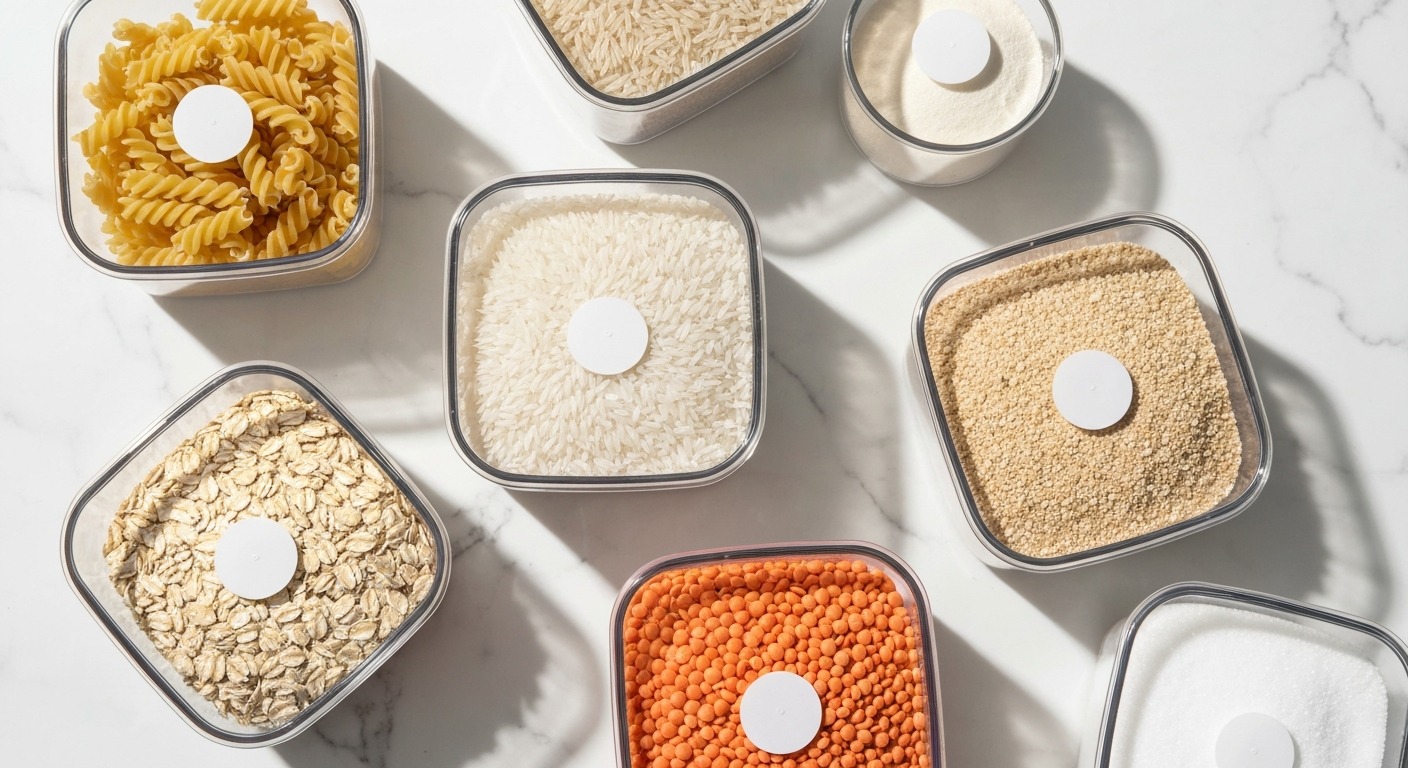
Clear Containers and Labelling: Your Visual Superpower
Clear containers are the single best investment you can make for pantry organisation. They solve three problems simultaneously: they keep food fresher for longer by creating an airtight seal, they let you see exactly what remains at a glance, and they create a uniform visual appearance that makes even a basic pantry look intentionally designed.
Choosing the Right Containers
Not all containers are equal. When selecting containers for your pantry, prioritise these features:
Airtight seal — This is non-negotiable in Australian homes where humidity can be high, particularly in summer. An airtight container keeps pantry moths, weevils, and moisture out. Look for containers with silicone gaskets and snap-lock lids.
Clear bodies — Opaque containers defeat the primary purpose. You want to see the contents without opening anything.
Uniform shapes and sizes — This is where many homeowners overspend on pretty mismatched sets. Uniform rectangular or square containers stack efficiently and look cohesive. Round containers are excellent for ingredients stored in deeper pantries, particularly in corner spaces.
Durable materials — BPA-free plastic is lightweight and affordable. Glass containers are heavier but more resistant to staining and do not absorb odours. For most households, a mix works well — glass for oils and strongly scented ingredients, BPA-free plastic for dry goods.
Matching lid sizes to contents — Small lids on small containers and large lids on large containers prevents the frustration of reaching for the lid you need and finding it is the wrong size.
The Labelling System That Lasts
Labels are only useful if they stay on. Handwritten labels peel. Regular adhesive labels curl at the edges in humid conditions. The most durable labelling approaches include:
Label maker — A handheld label maker produces clean, uniform labels that peel away cleanly when you need to repurpose containers. Brands like Brother and Dymo offer label makers with pantry-specific label stock.
Printed labels — You can design labels in Canva or a word processor and print them on sticker paper. This allows icons, colour coding, and custom fonts.
Chalkboard or whiteboard labels — Reusable chalkboard labels on container lids allow you to update contents without replacing labels. This is especially useful for containers used for different purposes seasonally.
Shelf-edge labels — Attach a strip of label tape or printed card to the front edge of each shelf listing the zone's contents. This helps every household member return items to the correct place.

What Goes in Containers vs What Stays in Original Packaging
A practical rule: anything that comes in flimsy, partially opened, or non-airtight packaging goes into a sealed container. This includes:
- Breakfast cereals (crushed by cardboard packaging, staleness from air exposure)
- Oats and grains (vulnerable to pantry moths)
- Flour and self-raising flour (attracts weevils)
- Rice and pasta (best kept airtight)
- Nuts and seeds (rancid quickly when exposed to air)
- Herbs and spices (lose potency without airtight storage)
Items that generally stay in original packaging include unopened canned goods, sealed glass jars with airtight lids, and products with packaging designed for prolonged shelf storage. However, once opened, even these benefit from transfer to a sealed container.
If you are looking for container options, IKEA's KUNGSFORS and BESTÅ ranges are popular choices for pantry organisation, and a wide range of pantry container sets are available on Amazon (browse pantry containers on Amazon Australia with affiliate tag).
Matching Containers to Your Space
Buying containers before measuring your shelves is one of the most expensive mistakes in pantry organisation. Before purchasing, measure every shelf's width, depth, and height. Account for any trim, shelf edges, or uneven surfaces that reduce the usable dimension. For pull-out drawers, measure the interior cavity rather than the opening — drawers often have internal framing that reduces the usable space by 5–10mm on each side.
Once you have your measurements, map out which container sizes fit where before committing to a purchase. For a full guide to measuring and fitting storage in awkward kitchen spaces, see our guide to awkward kitchen storage solutions, which covers corner pantries, slanted ceilings, and narrow but deep shelving units.
Container Sizing by Zone
Different zones call for different container sizes. A practical starting configuration for a standard Australian pantry with 300mm-deep shelves:
- Breakfast zone: 1.5–2L rectangular containers for cereal and granola
- Baking zone: 2–3L containers for flour and sugar; smaller 400–600ml jars for baking powder, cocoa, and spices
- Snacks zone: 1–1.5L containers for chips and crackers; 400ml jars for nuts and dried fruit
- Pasta and rice zone: 2–3L tall containers for long pasta; 1.5L wide containers for rice
Uniform sizing within each zone makes restocking faster and keeps the visual look consistent.
Deep Shelf Solutions: Conquer the Back Rows
Deep pantry shelves are one of the most challenging storage problems in any kitchen. Items placed at the back are forgotten, expire unused, and create hidden clutter that silently accumulates. Solving deep shelf storage is the difference between a pantry that works for a month and one that works for years.
Pull-Out Drawers and Sliding Baskets
Installing pull-out drawers or wire sliding baskets in deep pantry shelves completely transforms access. Instead of reaching into the dark back corner of a shelf, you pull the entire basket toward you, revealing everything at once. These are particularly effective for lower shelves that are harder to reach and for pantries with children who cannot safely lean into deep spaces.
Pull-out solutions range from budget-friendly wire basket Organisers that sit on existing shelves to custom-fitted drawer systems installed directly into the pantry frame. For renters, freestanding pull-out storage units offer a similar benefit without any installation commitment.
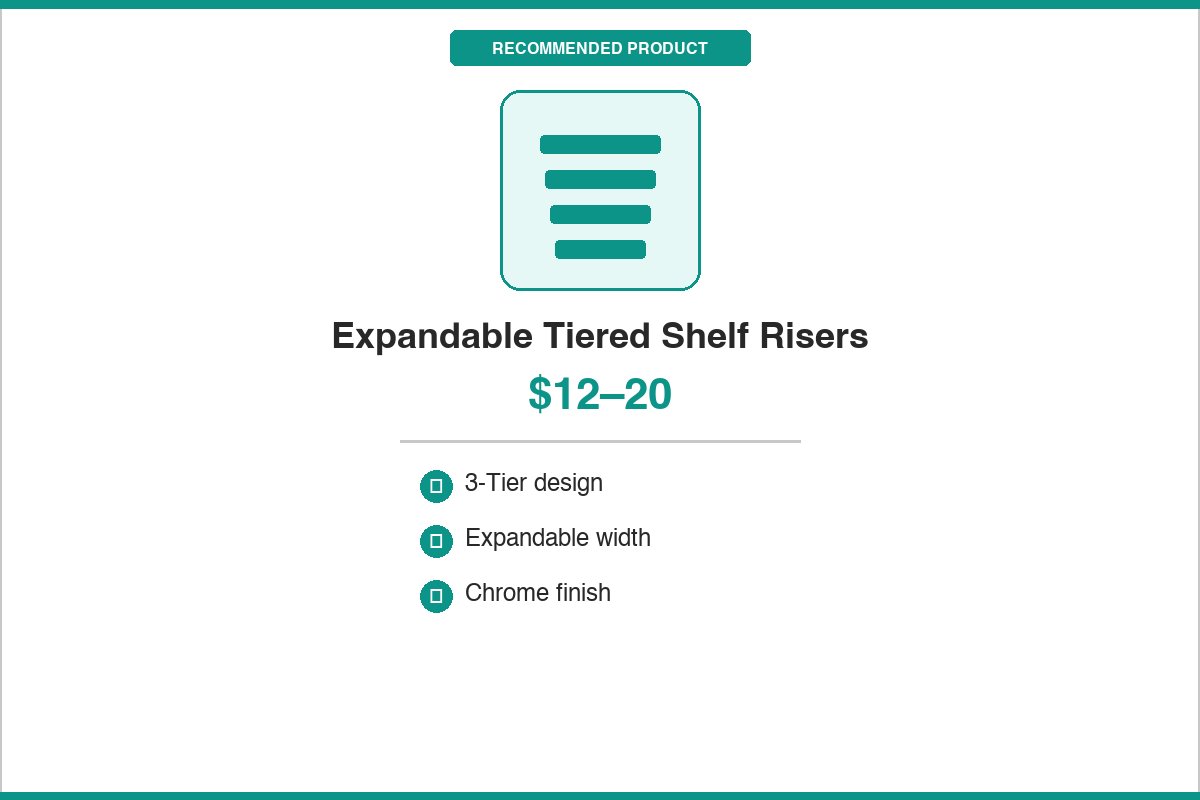
Tiered Risers and Shelf Dividers
Tiered risers create a stepped arrangement that places items at multiple heights within a single shelf depth. This means items at the front are at one level and items at the back are on a raised platform, making everything visible without reaching behind anything.
Shelf dividers are another underutilised tool. A wire or acrylic shelf divider installed in the middle of a deep shelf creates two separate shallower sections, effectively halving the depth problem. They are excellent for storing baking trays, cutting boards, and large platters vertically.
The Back-to-Front and Top-to-Bottom Rules
For deep shelves without pull-out Organisers, the back-to-front rule is essential: always place newer items at the back and push older items to the front. This simple habit ensures the first item you reach for is always the oldest, preventing the "buried expired food" problem entirely.
Similarly, top-to-bottom applies to vertically stacked items: place the heavier, larger item at the bottom and stack lighter items on top, ensuring nothing topples when you reach for something in front.
Visual Tricks and Space-Maximising Hacks
Beyond structural Organisers, a range of visual and spatial tricks can dramatically improve pantry functionality without requiring any construction or renovation.
Lazy Susans for Corner Pantries
Corner pantry spaces are notoriously difficult to use efficiently. A rotating lazy Susan placed in a corner shelf transforms dead space into accessible storage. Rotating the unit reveals all items — spices, sauces, condiments — without reaching into a dark corner or removing items in front to access items behind.
For pantry cabinets with deep corner recesses, a two-tier lazy Susan (a lower tier and an upper tier on the same pole) doubles the storage capacity of the space.
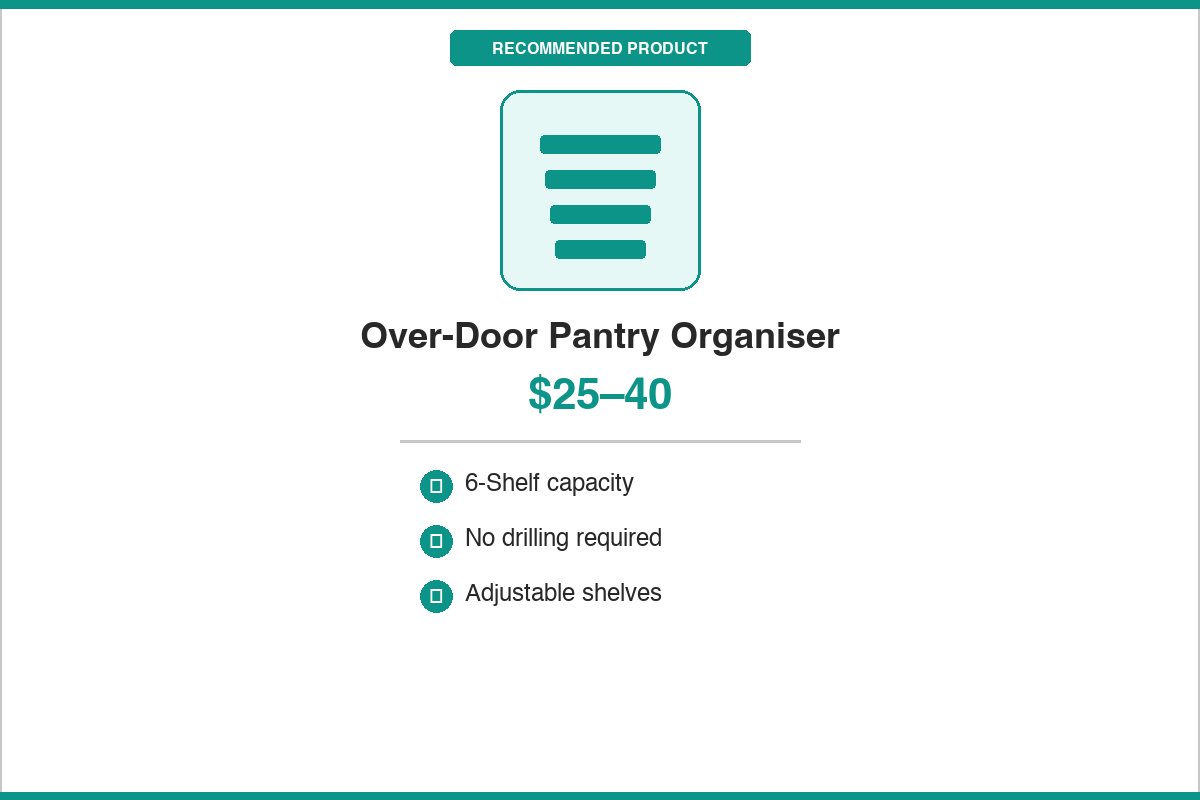
Door-Mounted Storage
The inside of your pantry door is valuable real estate that most households leave completely unused. Over-the-door storage Organisers with pockets are widely available and install without tools using no-mark hooks. These pockets hold packets, small jars, spice tins, and travel-size toiletries.
For a more permanent solution, cork board mounted on the inside of the door provides a place to pin grocery lists, recipe tear-outs, and use-by date reminders.
Consistent Colour Coding
Assigning colours to zones — blue for breakfast items, green for snacks, white for baking — makes finding things intuitive and visually appealing. You do not need to paint or buy expensive colour-coded containers. Coloured washi tape on container lids, coloured labels, or coloured dots applied to container tops achieves the same result at minimal cost. Every household member, including young children, can learn the system in a single afternoon.
Transparent Shelf Liners
Line pantry shelves with a clear non-slip shelf liner before returning items. This serves two purposes: it prevents items from sliding when you open and close the pantry door, and it makes wiping up spills far easier. Washable and reusable silicone liners are a worthwhile one-time purchase that pays off every time a honey jar leaks or a flour bag tears.
Door and Wall Storage: Use Every Available Surface
A fully Organised pantry extends beyond the shelves themselves. Walls, the backs of doors, and even the ceiling can contribute meaningful storage without encroaching on usable floor space.
Over-the-Door Racks and Pocket Organisers
As mentioned above, over-the-door storage is one of the most cost-effective pantry upgrades available. For households going a step further, adhesive wall-mounted rail systems with S-hooks can hang items from the pantry's interior wall — perfect for hanging aprons, tote bags used for grocery shopping, or mesh produce bags.
Vertical Storage for Baking Sheets and Cutting Boards
Baking sheets, chopping boards, and large platters stacked horizontally waste significant vertical space. A vertical file Organiser installed inside the pantry or on a pantry wall keeps these items upright and immediately accessible. Most vertical file Organisers designed for office filing cabinets work perfectly in pantries for this purpose.
Ceiling-Mounted Hanging Storage
For deep but tall pantries, ceiling-mounted wire racks or hanging baskets add a second layer of storage without reducing shelf access. This is particularly useful for storing bulky, lightweight items like large bags of chips or boxes of party supplies that do not need to be accessed daily.
Maintenance Routines: Keep Your System Working Long-Term
The most beautifully organised pantry in the world will degrade without a simple, repeatable maintenance routine. The good news: a functional maintenance habit takes as little as 10 minutes per week.
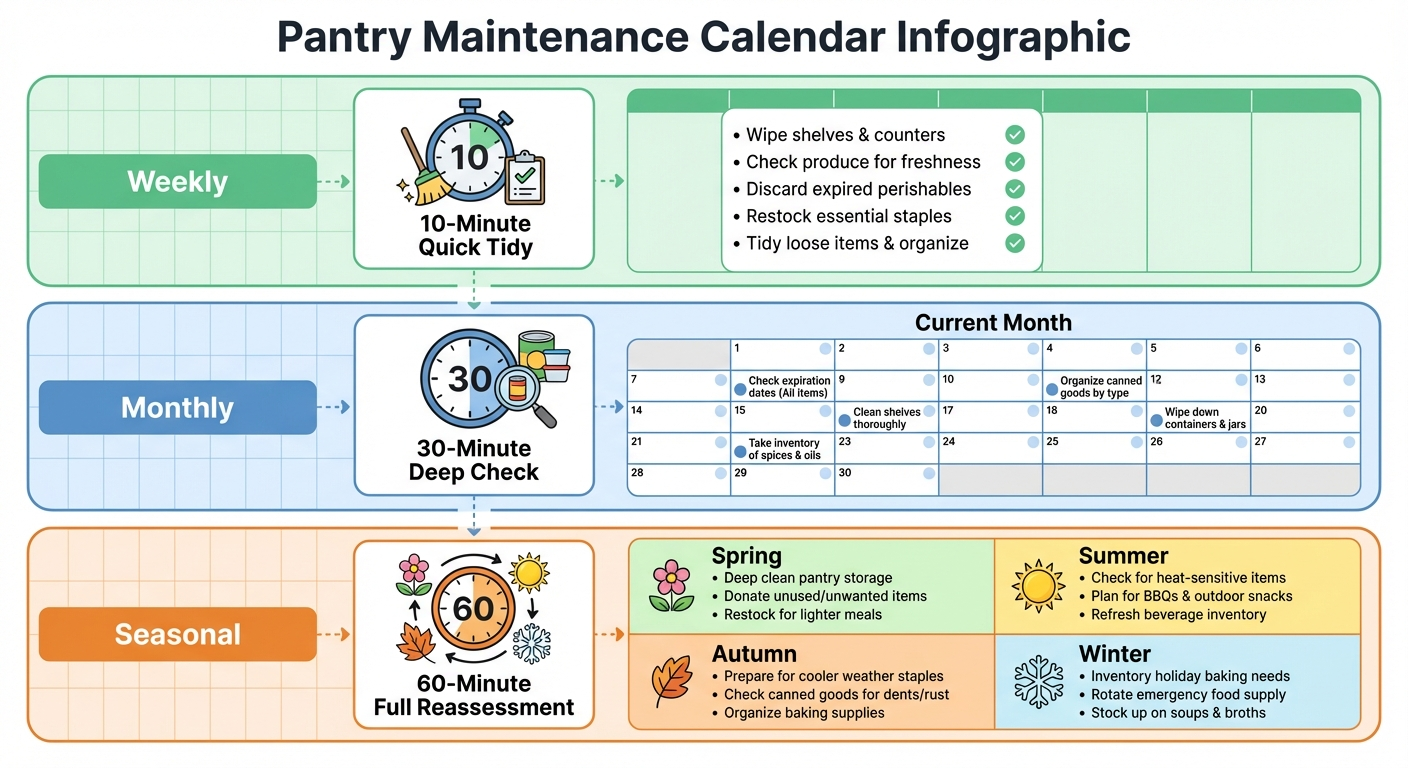
Weekly Quick Tidy (10 Minutes)
Once per week — Sunday evening works well for many households — spend 10 minutes doing the following:
- Return every item to its correct zone. Check that nothing has been placed in the wrong section.
- Wipe any spills or crumbs from shelves and container lids.
- Check that container lids are firmly sealed.
- Add items to your shopping list if any zone is running low.
Monthly Deep Check (30 Minutes, Once Per Month)
Once per month, conduct a more thorough inspection:
- Check all use-by dates and discard anything expired or stale.
- Remove items from the back of shelves and place them at the front (back-to-front rule reinforcement).
- Wash any shelf liners or floor mats in the pantry.
- Wipe down the interiors of any clear containers that have developed moisture or residue.
Seasonal Reorganisation (Once Every 3–4 Months)
Every three to four months, reassess your system with these questions:
- Has our household's eating pattern changed? (New baby, dietary requirements, different schedule?)
- Are there zones that constantly overflow or stay nearly empty?
- Have we acquired new items that do not fit into existing zones?
- Is the labelling still accurate and readable?
Adjust your zones, containers, and labels based on your answers. A pantry system is a living thing — it should evolve with your household, not stay frozen in the configuration it was set up with. For more maintenance tips across the whole home, see our guide to weekly cleaning schedules for busy households.
Good sleep and a clutter-free home environment reinforce each other — when your living spaces are calm and organised, falling asleep is easier too. For broader home decluttering strategies that support better rest, see SleepBetterFaster's guide to decluttering for better sleep.
Common Pantry Organisation Mistakes to Avoid
Understanding what not to do is just as valuable as knowing what to do. Here are the most common mistakes that cause pantry systems to fail:
Mistake 1: Buying Containers Before Measuring — Purchasing beautiful containers only to find they do not fit your shelf dimensions is a frustration you can avoid entirely. Measure first, then shop.
Mistake 2: Overcomplicating the System — A system with 15 zones and 40 different container types is unsustainable. Start with 5–6 broad zones and add complexity only if the household genuinely needs it.
Mistake 3: Labelling Containers Before Knowing Contents — Labelling a container "Flour" only to use it for sugar creates long-term confusion. Fill containers first, then label with their actual contents.
Mistake 4: Ignoring the Household's Actual Habits — If your family never eats muesli, do not dedicate an entire shelf to muesli varieties. Design zones around your real eating patterns, not an idealized version of how you think your pantry should look.
Mistake 5: Skipping the Clear-Out — Attempting to organise over existing clutter traps the clutter. A proper clear-out before setting up any system is the single most impactful step and cannot be skipped.
Mistake 6: No Designated Drop Zone for Incoming Groceries — Groceries brought home need a place to be sorted before being put away. Without a designated spot — even just a basket on the counter — unpacked items pile up and overwhelm the newly organised system.
Pantry Solutions Comparison: Which Approach Suits Your Space?
With so many pantry organisation options available, it can be hard to know which approach is right for your space and budget. This comparison table summarises the key features, costs, and best-use cases for the most popular solutions discussed in this guide.
| Solution | Cost Range (AUD) | Best For | Renter-Friendly | Difficulty |
|---|---|---|---|---|
| Zone labelling only | $5–$20 | Any pantry | Yes | Easy |
| Clear airtight containers | $50–$200 | Dry goods storage | Yes | Easy |
| Pull-out wire baskets | $30–$120 per shelf | Deep shelves | Yes (freestanding) | Easy–Medium |
| Tiered risers | $15–$80 | Standard depth shelves | Yes | Easy |
| Lazy Susan | $25–$100 | Corner pantry | Yes | Easy |
| Over-the-door organiser | $15–$50 | Door storage | Yes | Easy |
| Custom pull-out drawers | $300–$900 | Full pantry rebuild | No | Hard |
| Vertical file divider | $20–$60 | Baking trays, boards | Yes | Easy |
For most Australian households, the most cost-effective starting point is a combination of zone labelling, clear containers for dry goods, and tiered risers — an investment of around $100–$150 that delivers immediate and lasting results. Custom pull-out drawer systems are best suited to homeowners planning a longer-term kitchen renovation.
Frequently Asked Questions
What is the best way to organise a pantry?
The best way to organise a pantry is to group similar items into dedicated zones (such as baking, snacks, breakfast, and canned goods), use clear labelled containers to contain loose items, and apply the eyes-level rule so the most frequently used items sit at eye height for easy access. This approach is simple enough for every household member to maintain and scales as your pantry grows.
How do you organise a pantry with deep shelves?
Organise a pantry with deep shelves by installing pull-out drawers or sliding basket Organisers, using the back-to-front rule where you place newer items behind older ones, and adding tiered risers or lazy Susans in corner shelves so nothing gets buried and forgotten. Even without purchasing new Organisers, simply applying the back-to-front rule as a daily habit dramatically reduces food waste from forgotten expired items.
What containers are best for pantry storage?
Clear airtight containers are the best choice for pantry storage because they keep food fresh, let you see contents at a glance, and create a uniform clean look. Matched container sets in sizes suited to your pantry layout give the best results. Prioritise airtight seals, BPA-free materials, and uniform shapes for efficient stacking.
How often should you reorganise your pantry?
You should do a quick pantry tidy every 1–2 weeks and a full reorganisation every 3–4 months. Weekly tidies take 5–10 minutes and involve returning items to their zones and wiping spills. Quarterly sessions involve checking expiry dates, discarding stale food, and adjusting your system as your household needs change.
How do you label a pantry for easy access?
Label your pantry using a label maker or printed sticker labels on every container and shelf edge. Include both the category name and a visual icon or colour code so every household member can find and return items without asking where things go. Ensure labels are durable enough to withstand humidity and cleaning.
What is the eyes-level rule in pantry organisation?
The eyes-level rule places the items you reach for most often — breakfast cereals, snacks, frequently used ingredients — at eye height on the most accessible shelves. Lower shelves hold heavier or lesser-used items like large bags of flour or bulk stocks, while the highest shelves store seasonal or backup supplies.
Sources & Methodology
-
Food Standards Australia New Zealand (FSANZ) — Guidelines on pantry food storage, use-by and best-before date interpretation, and food safety recommendations for Australian home kitchens. https://www.foodstandards.gov.au
-
National Kitchen & Bath Association (NKBA) — Kitchen planning and storage research, including statistics on household time spent searching for items and optimal storage configuration guidelines. https://www.nkba.org
-
University of Florida Institute of Food and Agricultural Sciences (IFAS) — Research on airtight storage effectiveness for dry goods and pantry pest prevention through proper container sealing. https://edis.ifas.ufl.edu
-
Australian Government Department of Climate Change, Energy, the Environment and Water — State of the Environment Report 2021 — Data on household food waste in Australia, including statistics on edible food discarded from home pantries due to poor organisation and forgotten expiry.
-
Professional Organisers of Australia (POA) — Industry standards and best practice guidelines from the professional organising industry in Australia, including pantry and kitchen storage methodology. https://www.professionalorganisers.org.au
-
American Society of Interior Designers (ASID) — Space planning and storage design research, including evidence-based recommendations for shelf heights, zone placement, and accessibility considerations in residential pantry design.
About the Author
Sarah Mitchell is a Professional Organiser and Home Storage Specialist based in Melbourne, Australia. With over twelve years of experience helping households transform cluttered, chaotic spaces into functional, manageable homes, Sarah specialises in kitchen and pantry organisation systems that work for real families with real habits. She is a member of the Professional Organisers of Australia and holds certifications in home storage consulting from the Institute of Home Organization. Sarah has been featured in Good Housekeeping Australia, Better Homes and Gardens, and The Australian Women's Weekly for her practical, sustainable approach to home organisation. When she is not reorganising pantries, she writes about practical home management strategies at Home Organisation Guide.
Last updated: April 2026